So, the response to our Libs Elliott inspired cut paper quilt has been quite awesome. It's so wonderful to hear from educators, art lovers, and friends from around the world with positive feedback for our Zamo kids. I thought it would be cool to share how a few other art teachers have taken this project on in their own way with their own kids.
Wouldn't it be wild to see them all assembled together?
This piece was done by Tiffany Floyd and her 4th grade students. I love the addition of the
black border, too!
The 3 shots above are from Lauren Packard and her students in Brooklyn working away
on their collaborative.
These 3 are from all the way Australia. Teacher Chani Crow did this with 9 classes.
Pre-primary thru year 6.
This one is by Cassandra Birchmeier and her middle school students
in Fenton, Michigan. 500 students participated and they each had 20 minutes
to contribute.
Just yesterday, one got started in Massachusetts with Brittany Lebold and Melissa Hayes. If anyone else out there is trying this one on, I'd love to see them.
The 2nd graders are tackling contour line, pattern, and symmetry in their first go round in the art room this year. They are getting inspiration from Mexican muralist and designer Neuzz (Miguel Mejia). They are watching him paint a mural in Atlanta and noticing how he uses outlines to define his shapes and how he sometimes creates symmetry by matching one side of his designs with the other.
After watching the video of Neuzz working, students try on symmetry by follwoing along with me as we create a jaguar inspired by one of his illustrations. They then create one of their own next to it. Students identify which one they like better and share why with a neighbor. I encourage them to use a "because" statement to support their choice.
Students move on to a larger sheet of paper and redraw their chosen design. They trace their pencil lines with a wide sharpie and I ask them to use both thick and thin lines.
Students can add color with 2 colors only. I demo how even though they can only use 2 colors, if they press hard in places and soft in others, they can create a wider range of color variety.
The final step is to draw a contour line border around their face and cut that line. They choose a colored peice of paper to frame their drawing and glue it together.
Per usual, the 2nd graders complete a written exit slip about the project. I model how this works and go over the questions orally, so they understand what I'm asking them for. This is a big jump from their sentence strips that they completed for me as 1st graders and they are attacking it with gusto:)
I added another closure layer with this project. They partner presented one of their responses at their table. It gets them not only thinking and writing about their work, but encourages speaking and listening skills in the art room as well:)
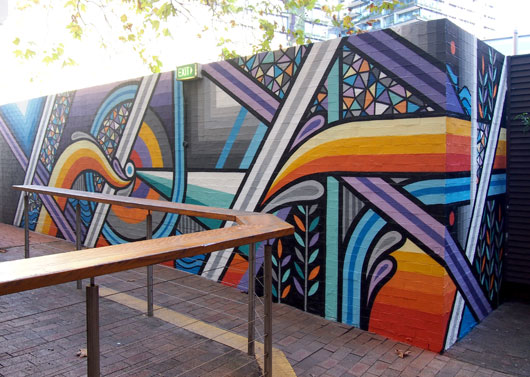
The newest superhero on the block! His super power is creating amazing murals in Australia and around the world! His secret identity is Brad Eastman:)
Beastman showed the 3rd graders that you could create a sense of movement in art by using line patterns throughout an art work. The patterns can be thought of like the beats in music. He showed them how you can have a pattern or a shape start out small and get bigger (like the light of a flashlight) to create a sense of movement too. He also allowed them to see his use of contour lines in all his work, big and small, to outline and define shapes.
Now, Beastman would not want copycats, so students were inspired by his vocabulary of line and shape to create an abstract drawing that showed a sense of movement.
The kids all did 2 guided sketches to reinforce line- diagonal, circular, angular, line pattern, shape pattern, line pattern fill, and curved. They told a neighbor why they were going to choose one of their sketches over the other. They were not allowed to just say that one was cooler than the other. They needed to support their choice with evidence.
Students drew out their arrangement on a larger sheet. If the design changed some, that was okay. If they realized they had more space to add more detail, line, or pattern, they could. They traced their lines with a wide chisel tip sharpie to emphasize the contours. I showed them how they could hold the marker differently to create variety in line width. They could then use any color combinations they wanted. All they needed to do was follow 2 rules- include color patterns and to vary pressing hard and soft to create different color values.
They then reflected on the process and product by completing an exit slip. All this took one full session and about a third of a second.
The remaining time was spent on creating artist trading cards for the big trade being organized by Nic over at MiniMatisse. They created another drawing, still inspired by Beastman's work. They could base it on their large drawing or do something different as long as they still used the vocabulary of line, shape, and pattern. Students watched a short video that Nic put together that illustrated the importance of quality in an ATC. I reiterated her points and posted them on my board to remind my kids.
For students to participate in the upcoming trade, students must make sure they follow the 4 rules of quality- show proper use of materials, take their time, use the whole space, and be prideful.
the process- planning, refining, reflecting, and extending.
And now, I don't see them again for another 4 weeks. Until then, stay creative my young 3rd grade padawans;)
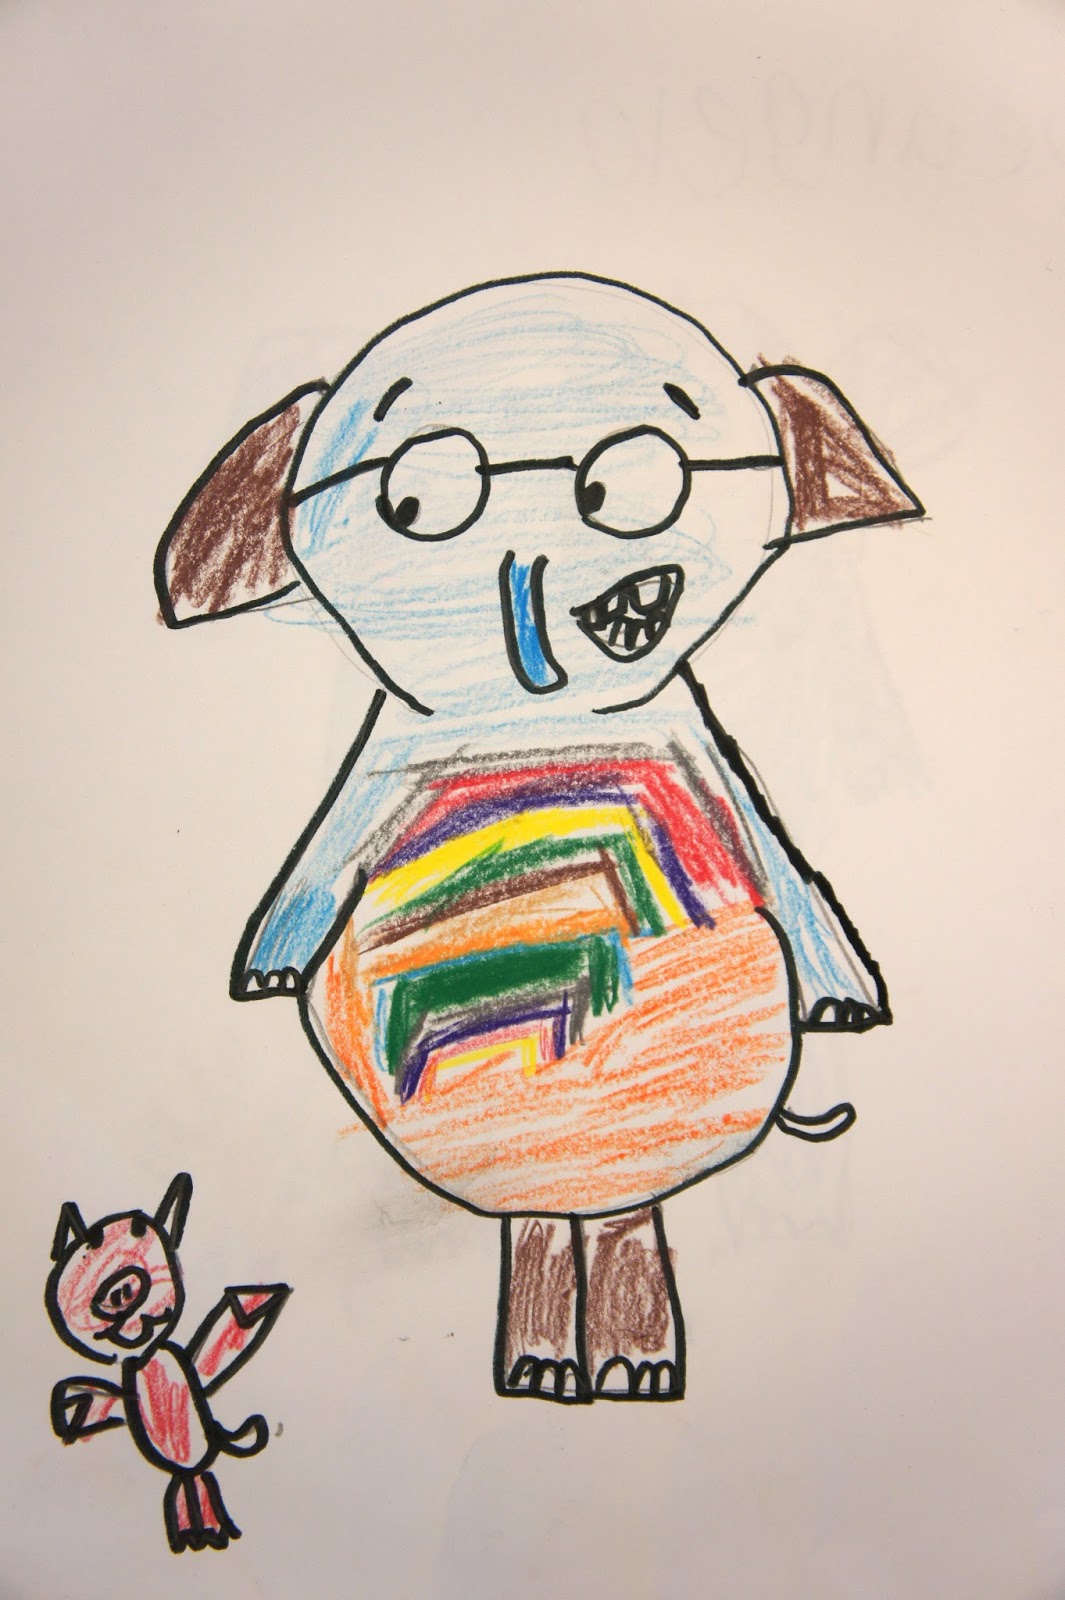
This is my first week with our youngest kiddos at Zamo. I introducing them to this Mo Willems book was a pretty perfect way to start the year:)
We found out what the jobs of an author and illustrator are, while seeing and then practicing using line to make shapes and feelings. As I read the book, I would stop on different pages so they could tell me how Gerald the elephant was feeling by the type of line Mo used to draw his mouth. Kids also got to see how just a couple lines next to a character could make it look like he or she was moving.
The drawing is pretty direct- I pre-drew the head shape and we went through the character parts step by step. Kids had choices for type of trunk, leg position, and pupil placement. I love the expression that is present in so many of the drawing the kids did.
It's going to be a fun year with these little ones:)