Wednesday, May 27, 2015

street sweets!

This week I'm chillin' with my kinders and we are using the most awesome mosaics by Jim Bachor to learn a little bit about texture in nature and art.

Jim has been buzzing all over the interwebs lately, and for good reason- his mosaic series of cool treats that are filling potholes in Chicago and elsewhere are super rad! You can use his work to introduce students to a variety of elements- texture, color value, 3d solids, art historical movements/techniques, and the purpose and place of art in society.


With my littles, we have been looking at how Jim uses light and dark colors to make his images look 3d, how the tiles feel different than the cement and road they are placed in, and the fact that these artworks are out in public, actually placed in the street, and not in an art gallery or museum.

I have been sharing some photos of his mosaics from the art blog Colossal and the kids are getting such a kick out of his work and subject. It really is such a great hook to get students engaged. If you follow him on instagram, you can see some more behind the scenes stuff too:)

After we look at Jim's work, we take a little on campus field trip- out to the playground with our black color sticks and white paper to do a rubbing of the black top and then over to one of the mosaics we did with students a few years back, so the kids can actually feel the difference between the tile surfaces and grout.


love:)

Then we come back in and cut out a large grey popsicle shape- larger than the actual pop to simulate the space and color of the grout of a mosaic. Kids pick a color for their treat and add white to a a third, leave a 3rd the color, and add black to the other third. We cut those parts up to little squares and rectangles (keeping them sorted and stacked in the process:) so that we can glue those onto the gray shape on the rubbing paper. I emphasize leaving little spaces between the pieces to simulate the look of a mosaic. Also, when we glue the pieces on, I show them how to put lines of glue on the gray paper, so they don't have to put glue on each individual piece.


And finito- the kinders have a delicious looking intro to texture, all thanks to Jim and the long line of mosaic artists that have come before!


Friday, May 22, 2015

glazing away.

The 5ths have been glazing their modified coil pots all week. Many trips back and forth to the kilns. I'm tired:)  Next week it will be the 3rd graders turn to work with clay... stay tuned!


Tuesday, May 19, 2015

colorful invaders.

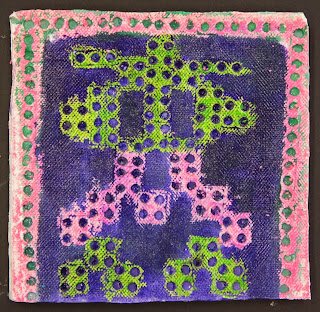
This week the 2nd graders are adding color to their invader tiles. I took a page out of Cassie Stephens playbook and am having them do a crayon resist painting instead of glazing the tiles. This allows for a lot of color variety and saves me from loading a lot of large flat pieces at a time when kiln space is at a premium.
an invader in space!

The kids are really enjoying the process. I emphasize that they should try and use either light or dark crayon colors and then paint with the opposite. 

The kids are doing exit slips that get them reflecting on what texture is and how thy used it in their work. As students are finishing up I go around and slap a few brush loads of gloss varnish on the tiles to give them that "we weren't fired, but kinda look like we could have been" clear coat;)


Some kids are being very controlled with their color work.


Other students are being more expressive and free with their color application.


Wednesday, May 13, 2015

clay all day.

This week I entered my clay phase;)

The 2nd and 5th graders are both working with clay for the next two weeks and then the 3rd graders will be for the two weeks after that. Time to break out the lotion:)

The 2nd graders are making clay tiles inspired by the work of Invader. I have been stoked about trying this with them for some time and I think the kids are enjoying it too. We take a look at his website and he's got a map of the world that shows where all his "invasions" have taken place. You click on any of the cities and it takes you to photo/s of the works at that place. Pretty darn slick! Look out for the moving one too- he's got a piece on the outside of the International Space Station too.


Five years ago, he invaded San Diego, so we look at those. Some of them are still around the city. While we are looking, I point out how he only uses squares and rectangles to create his images. We talk about pixels, old school videogames, and of course, minecraft.

The role the kids play in this project is that of an invader creator. Their job is to design their own invader using only squares and rectangles. Also, they use the texture of legos to alter the texture of their clay tile. The kids have been pretty engaged with this one;)

The kids sketch out 3 different designs, decide which one they will do, share their reasoning with a neighbor, and then get stamping. When we get to the stamping part, I emphasize that they only need to press softly. If they go to hard, they will punch a hole through the clay. Some kids inevitably do this, but I tell them it does add a little character to their overall design- which, when controlled, it does. They should use the legos as stamps and not as cookie cutters.


Next week, we'll paint 'em.

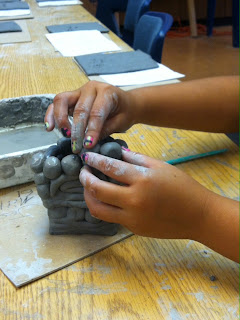
The 5th graders are making modified coil vessels for their clay project. I have been using work by high school students up in LA county as the inspiration for this one. Debra Price-Agrums teaches at Whitney high school and her students can rock the clay work:)

I demonstrate various ways they can coil and modify coils to create their form. The shape and style is up to them. Next week, they will glaze them.


I love how this guy used his leftovers to make something else, too:)

Check out that interior!